How to migrate databases in Supabase
––– views
By Kenneth Cassel
Migrations - Why we use migra
One of the main benefits of using Supabase is databases on the platform are powered by Postgres. Since Postgres itself is a mature and battle-tested database, there are a ton of options available for database migrations.
At Slip, we're using a tool called migra for database migrations. Essentially, it 'diffs' two databases and generates a script which can be applied to transform one database's shema into the target database's schema.
Like the Supabase team, we also have a preference for using diffing tools instead of manual migrations. They allow us to iterate quickly without the overhead of saving and managing our own SQL scripts, while still being confident that our schemas match across environments.
We explored a few options for migration tools and ended up using migra. It's fairly straight-forward to use and it's already dockerized — so you can use it inside of a CI/CD workflow easily.
There are few caveats to watch out for when using migra with Supabase projects and we're going to explore them in this tutorial!
Setup - Install Migra
migra is a Python program so you can either install it using Python's pip package manager, or use docker to pull down a ready-to-use image with migra.
We're going to use the docker image in this tutorial. If you don't already have docker installed on your machine, install it now.
Pull down the docker image
Optional: Create an alias
An optional step you can take here is creating an alias for migra so you don't have to type docker run djrobstep/migra migraevery time you want to use the tool.
Usage:
The most basic usage of migra takes the form of the following command.
The dburl_from should be the database you want new changes applied to. The dburl_target is the database whose schema you want to match.
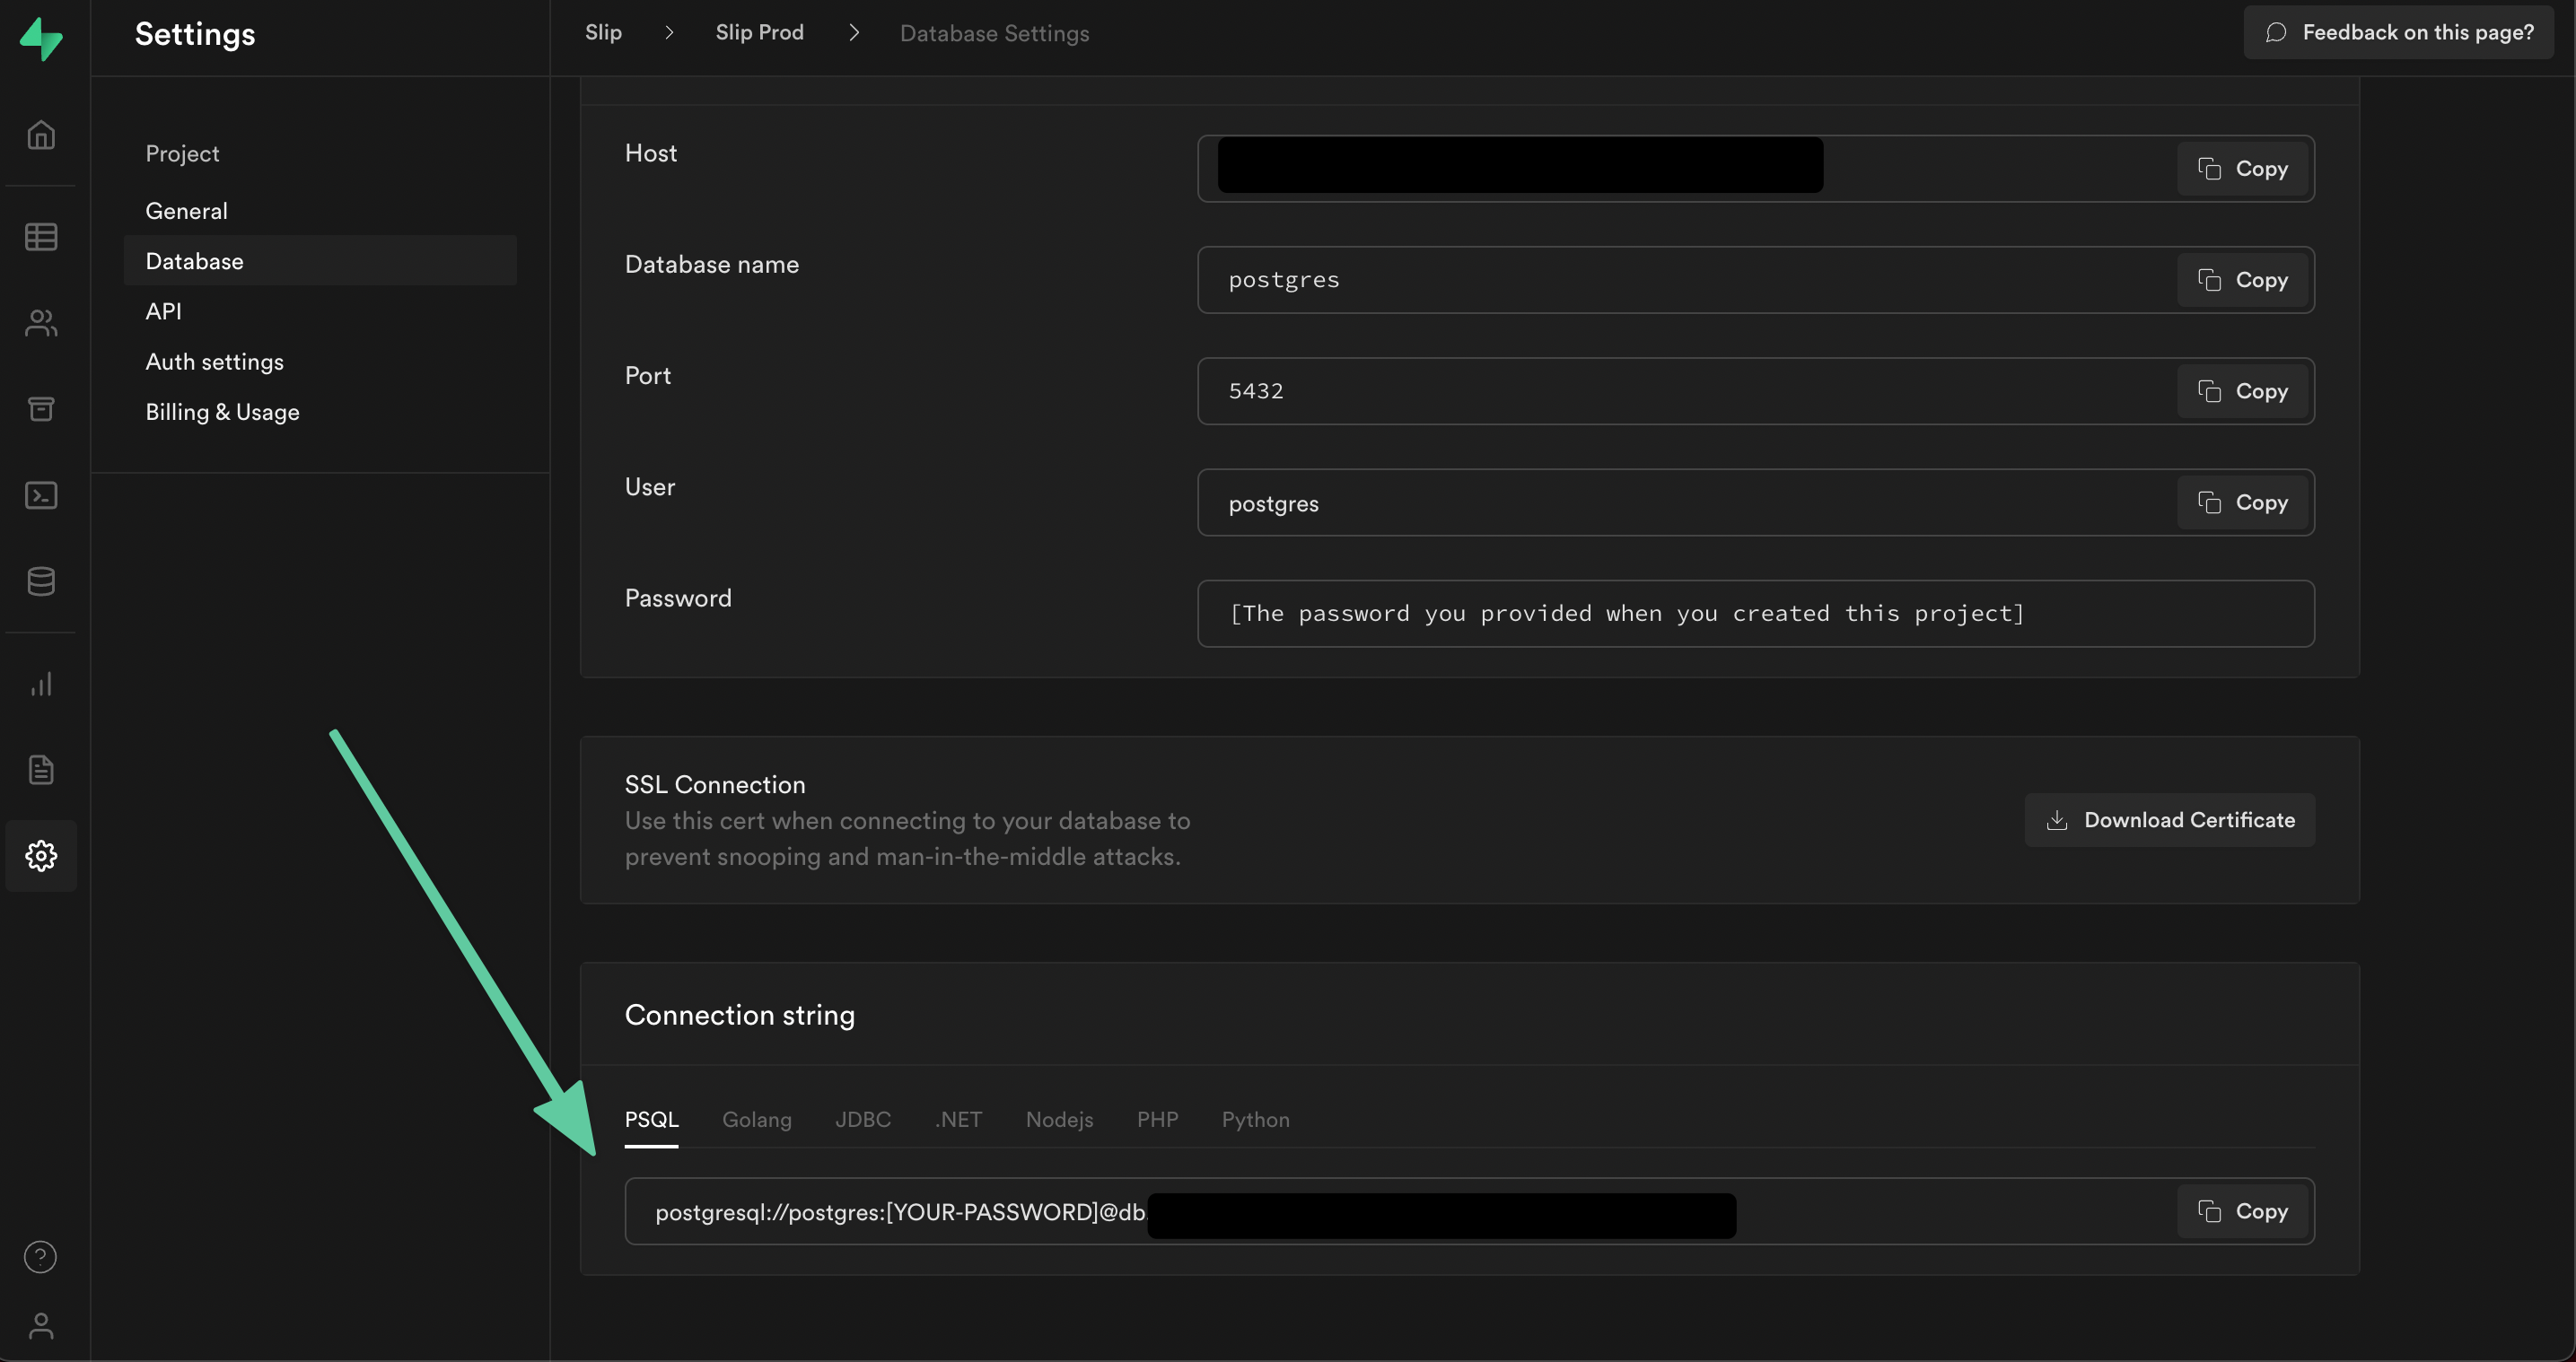
Find your Supabase Connection Details
You'll need your postgres connection string from both the projects you're using.
You can find this in the Settings -> Database screen inside of Supabase
Generate SQL Script from Schema Diff Using Migra
Let's imagine you have two Supabase projects/environments, a Dev project and a Staging project.
You just created a new feature called Tutorials, which allows users to post free tutorials to your site. It involved some database changes, including adding a new table and a new storage bucket (📝 we'll talk more about the bucket later in the tutorial).
Your new feature works locally but now you want to deploy it and do a run-through to find any edge cases when deployed to the Staging environment.
Luckily, you're using a migration tool like migra to manage your database schema changes. You won't have to manually record each change you've made, you can just diff your databases and generate a script!
You'll need to use the migra tool and pipe the generated sql commands to a file so you can inspect the changes.
Sometimes the script that migra generates will have drop statements. If it does, the command will fail unless you pass the --unsafe flag.
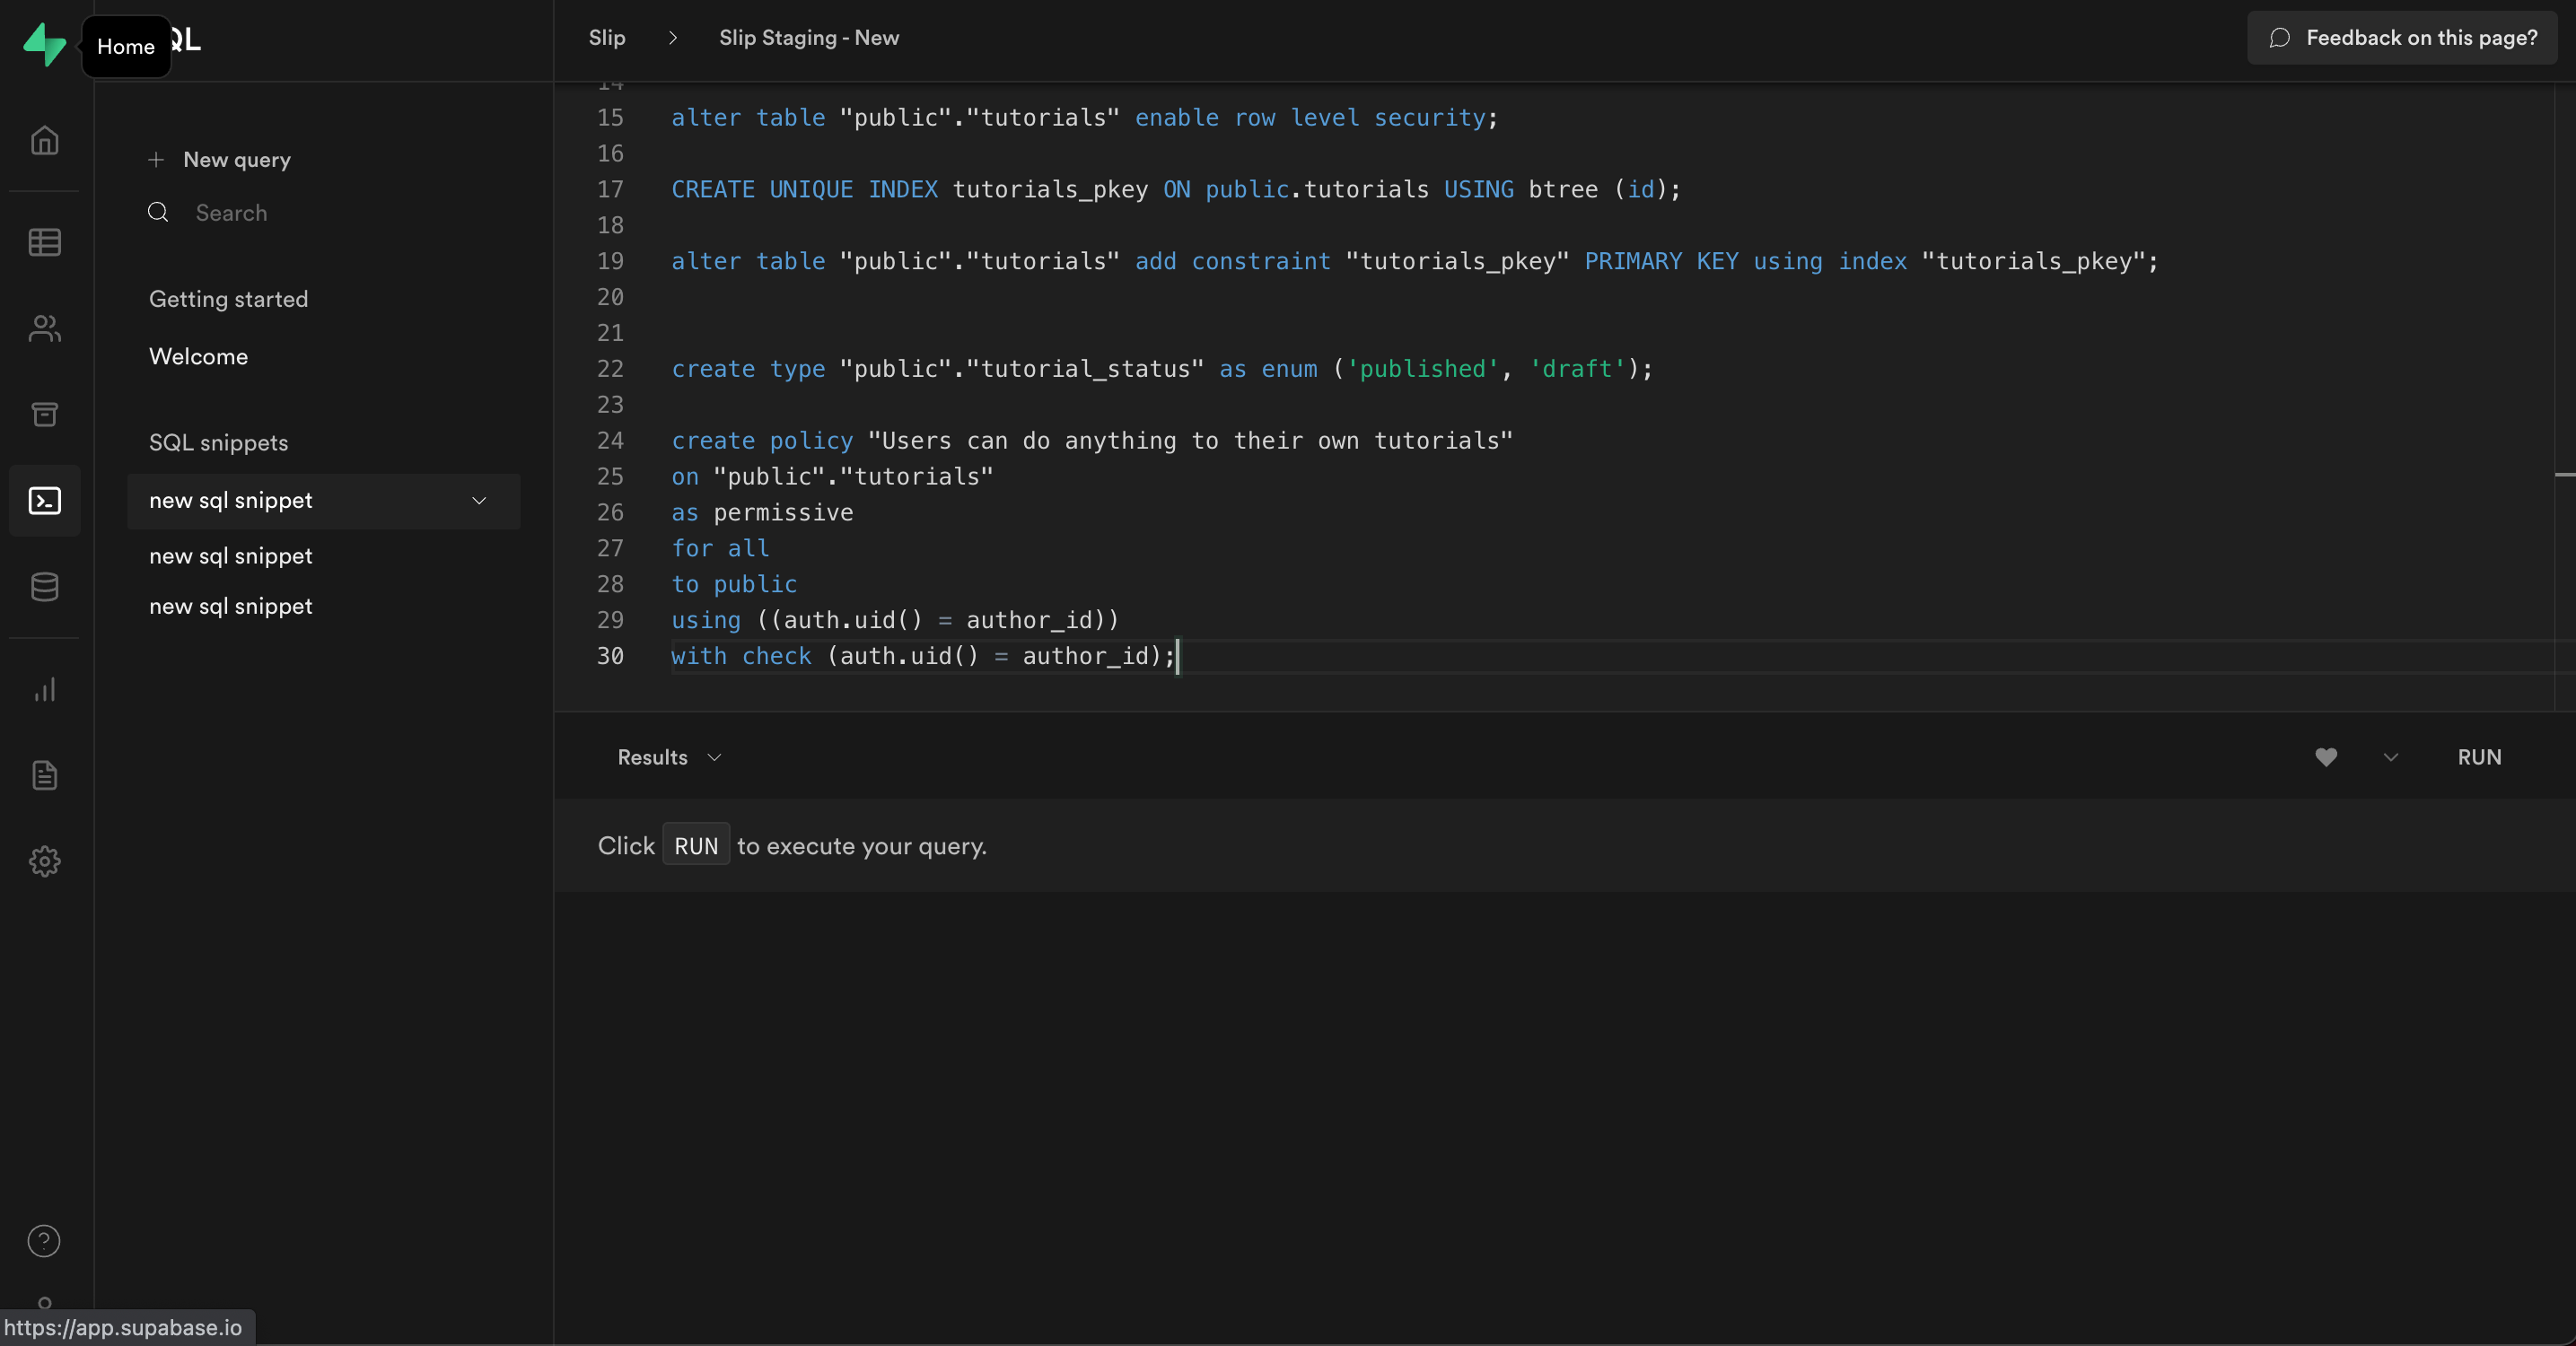
After running the command, you should end up with a file called stg_from_dev.sql which shows the diff between the two databases. It would look something like this:
Apply the migra generated SQL Script to the Staging Database
After generating a script, you should take some time to visually inspect and do a sanity check of the generated sql script, especially if you used the --unsafe flag.
If the script looks good, it's time to apply the changes to your database.
Copy the generated sql script and run it inside the Supabase SQL editor.
Congrats! 🎉 You just completed a database migration using migra for your Supabase project!
🚦 Wait up! - Migra doesn't migrate all Supabase data
In our scenario there is one more step we need to take so that our Staging environment is ready for the tutorial feature. We added a tutorials bucket, but it's not showing up in Staging!
Why is that? Doesn't migra generate an accurate schema diff across databases?
It does, but adding a new bucket doesn't affect our storage schema!
While migra is a great tool for performing database migrations, the underlying storage schema stays the same in Supabase when you add a new bucket. A new bucket doesn't represent a schema change, but a new entry inside of the storage.buckets table.
Running a quick SQL query select * from storage.buckets will show us that we've inserted a row into the storage.buckets table called tutorials. We didn't change the schema.
Add any storage or authentication changes manually
To complete our migration and get our Staging environment working, we'll need to manually add any storage or authentication changes to our Staging Supabase project.
In our case, all we added on the storage or authentication front was a new public bucket called tutorials, so we'll apply those changes to the Staging environment and we're good to go!
Next steps:
We went over a very basic migration scenario, but it was a manual process.
A great next step would be setting up migra migrations to happen automatically inside of a CI/CD workflow.
We're going to be exploring doing that ourselves using Github Actions for a more automated experience. We'll be sure to write about it and let you know how we ultimately set it up!
If you have any questions or feedback feel free to reach out to me on Twitter @KennethCassel!
Thanks for reading!
Like this content?
If you'd like to learn more about Supabase check out our upcoming course Advanced Supabase Techniques, where we build and teach you techniques we've learned for making development with Supabase faster!